
I just finished the first week of a three-week trip to Southeast Asia where I am traveling to Thailand, Laos, and Vietnam. This trip is primarily for me to make photographs and videos to add to my Stocksy portfolio, create content for my business, and also to explore, become inspired, and do some writing. I may even be able to sneak in some down-time while I’m there. I’m traveling with a small group, but while it’s not a “photography-themed” group I should have a lot of freedom to explore and create my own experiences.
This will be my first big trip with my Shimoda Explore 40 so I’m excited to put it through its paces. (Full disclosure: I was given this bag for free from Shimoda Designs.) I’ve used it many times on local outings and trips, but never internationally. So far I LOVE this bag and can say that this is the best adventure-style camera bag I have owned. It’s comfortable, the design is well thought out, and they even make it work well people of all shapes, sizes, and genders.
Overall, I packed fairly light. I’m traveling carry-on only, and for camera gear I decided to go with mostly small lenses for this trip, aside from the FUJINON 55–200mm that I have on loan from Fujifilm. With that said, I still have a fair amount of gear, but I was easily able to pack it into my Shimoda bag.
Please note: This article may contain affiliate links.
Camera Gear
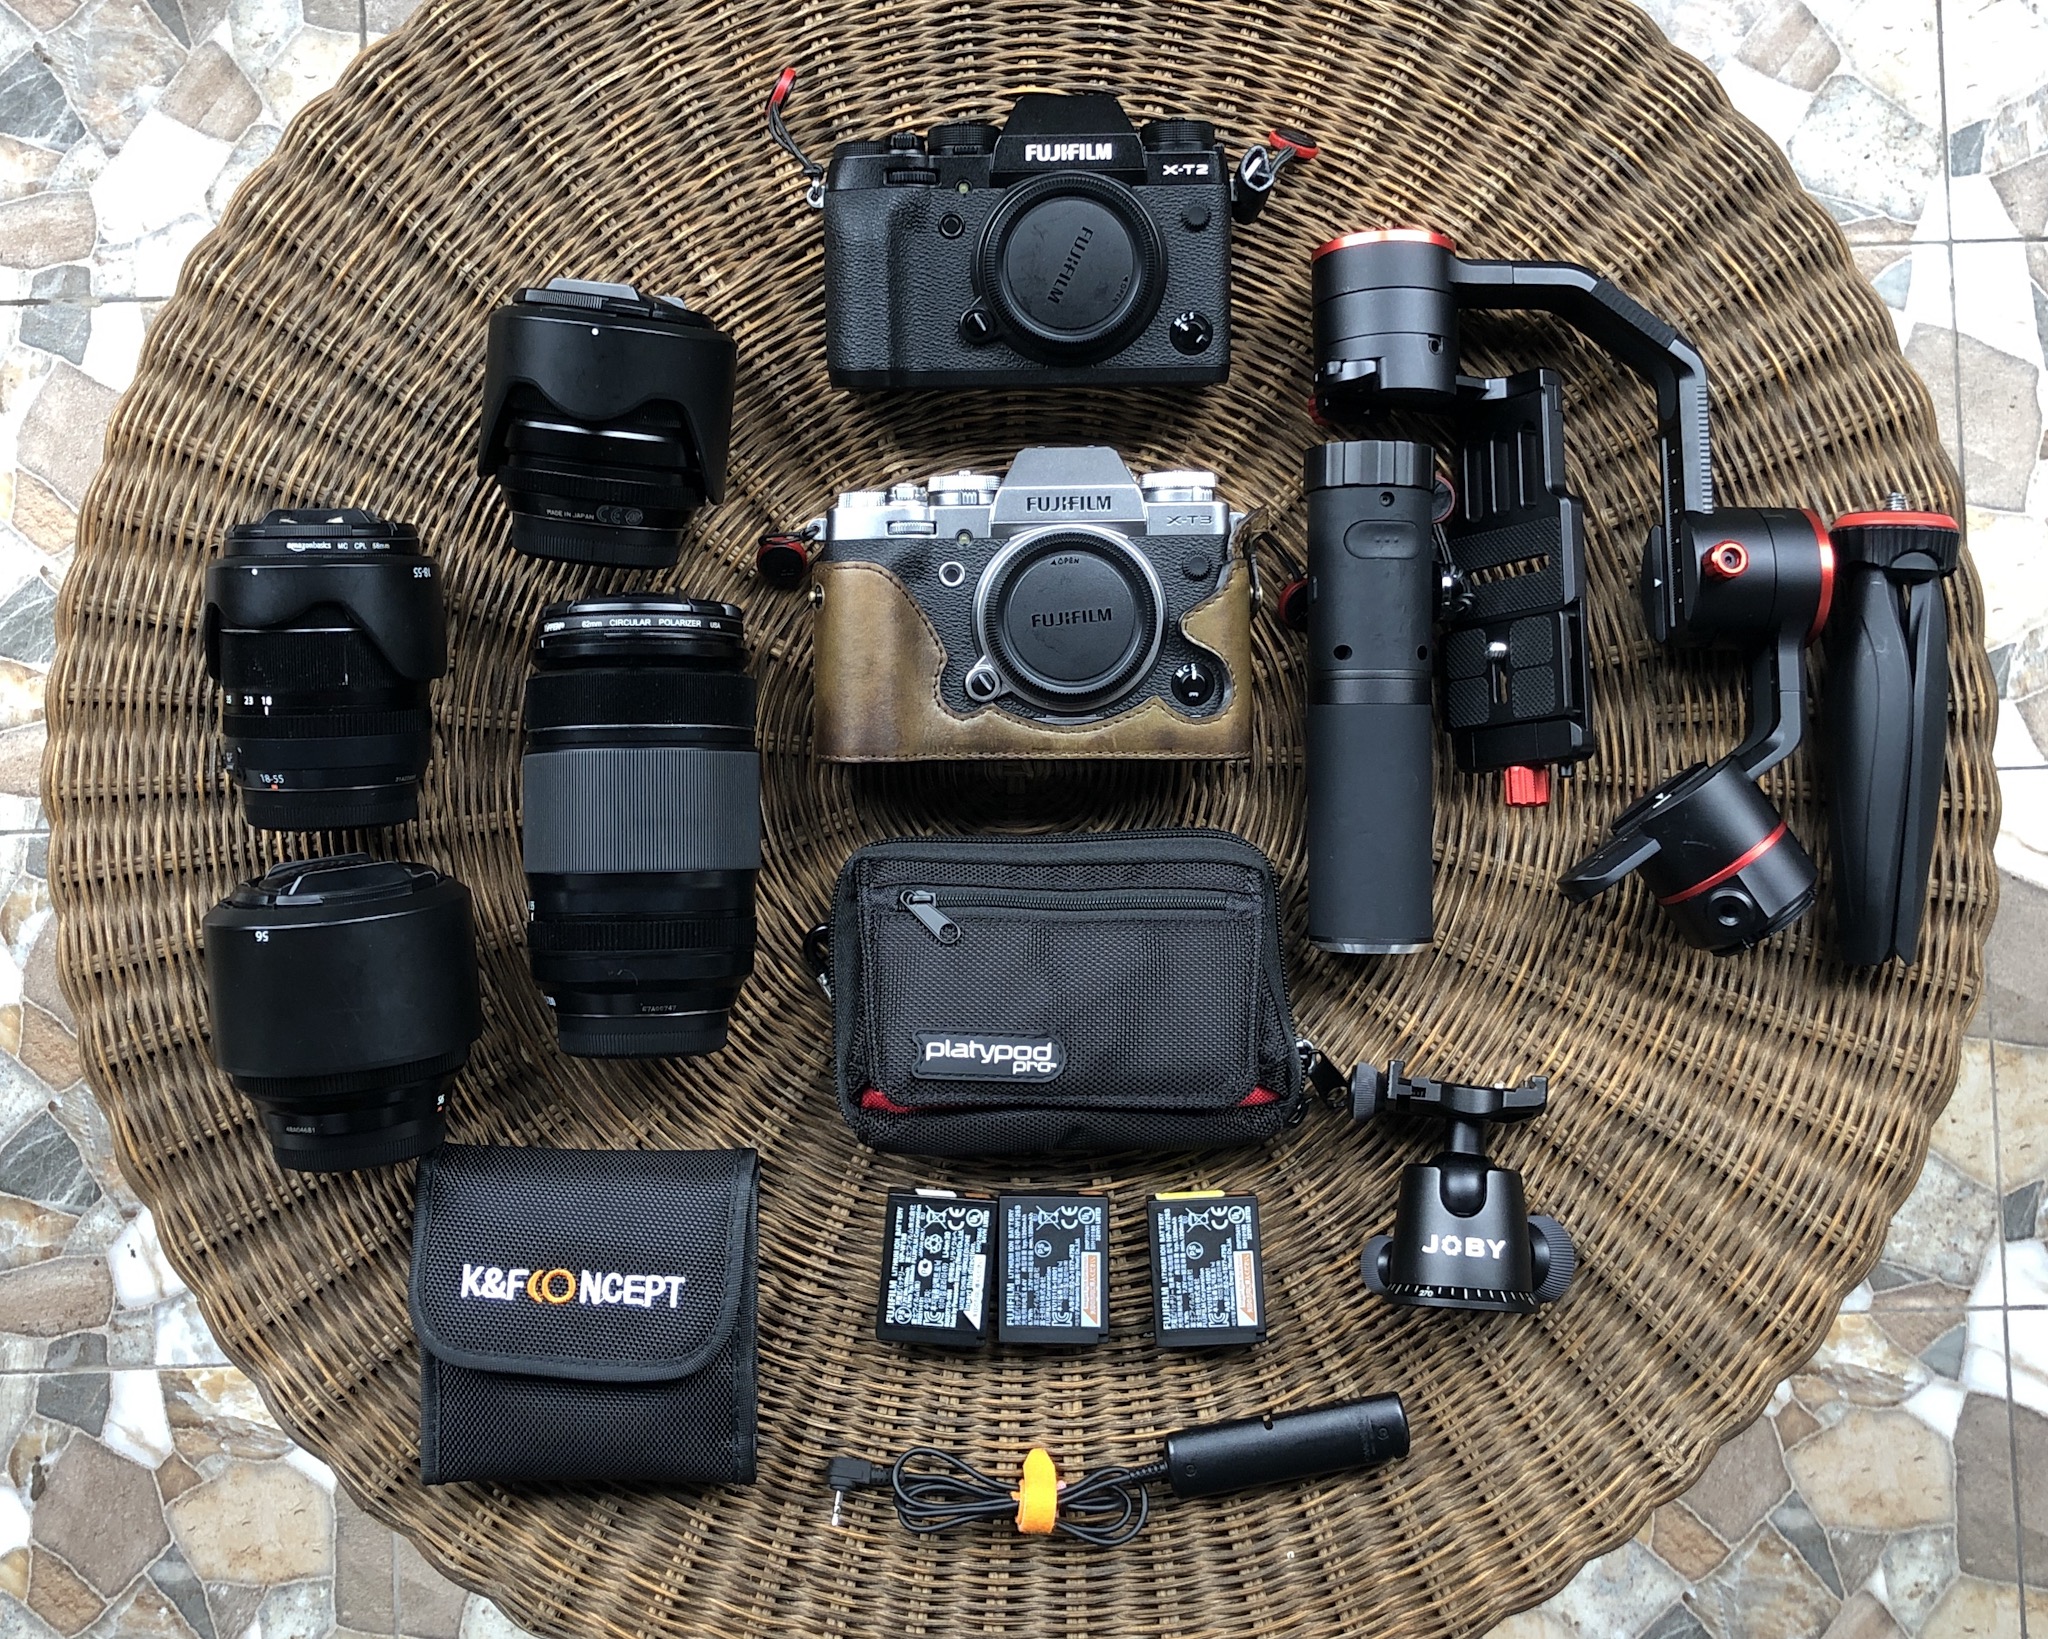
My camera gear for this trip.
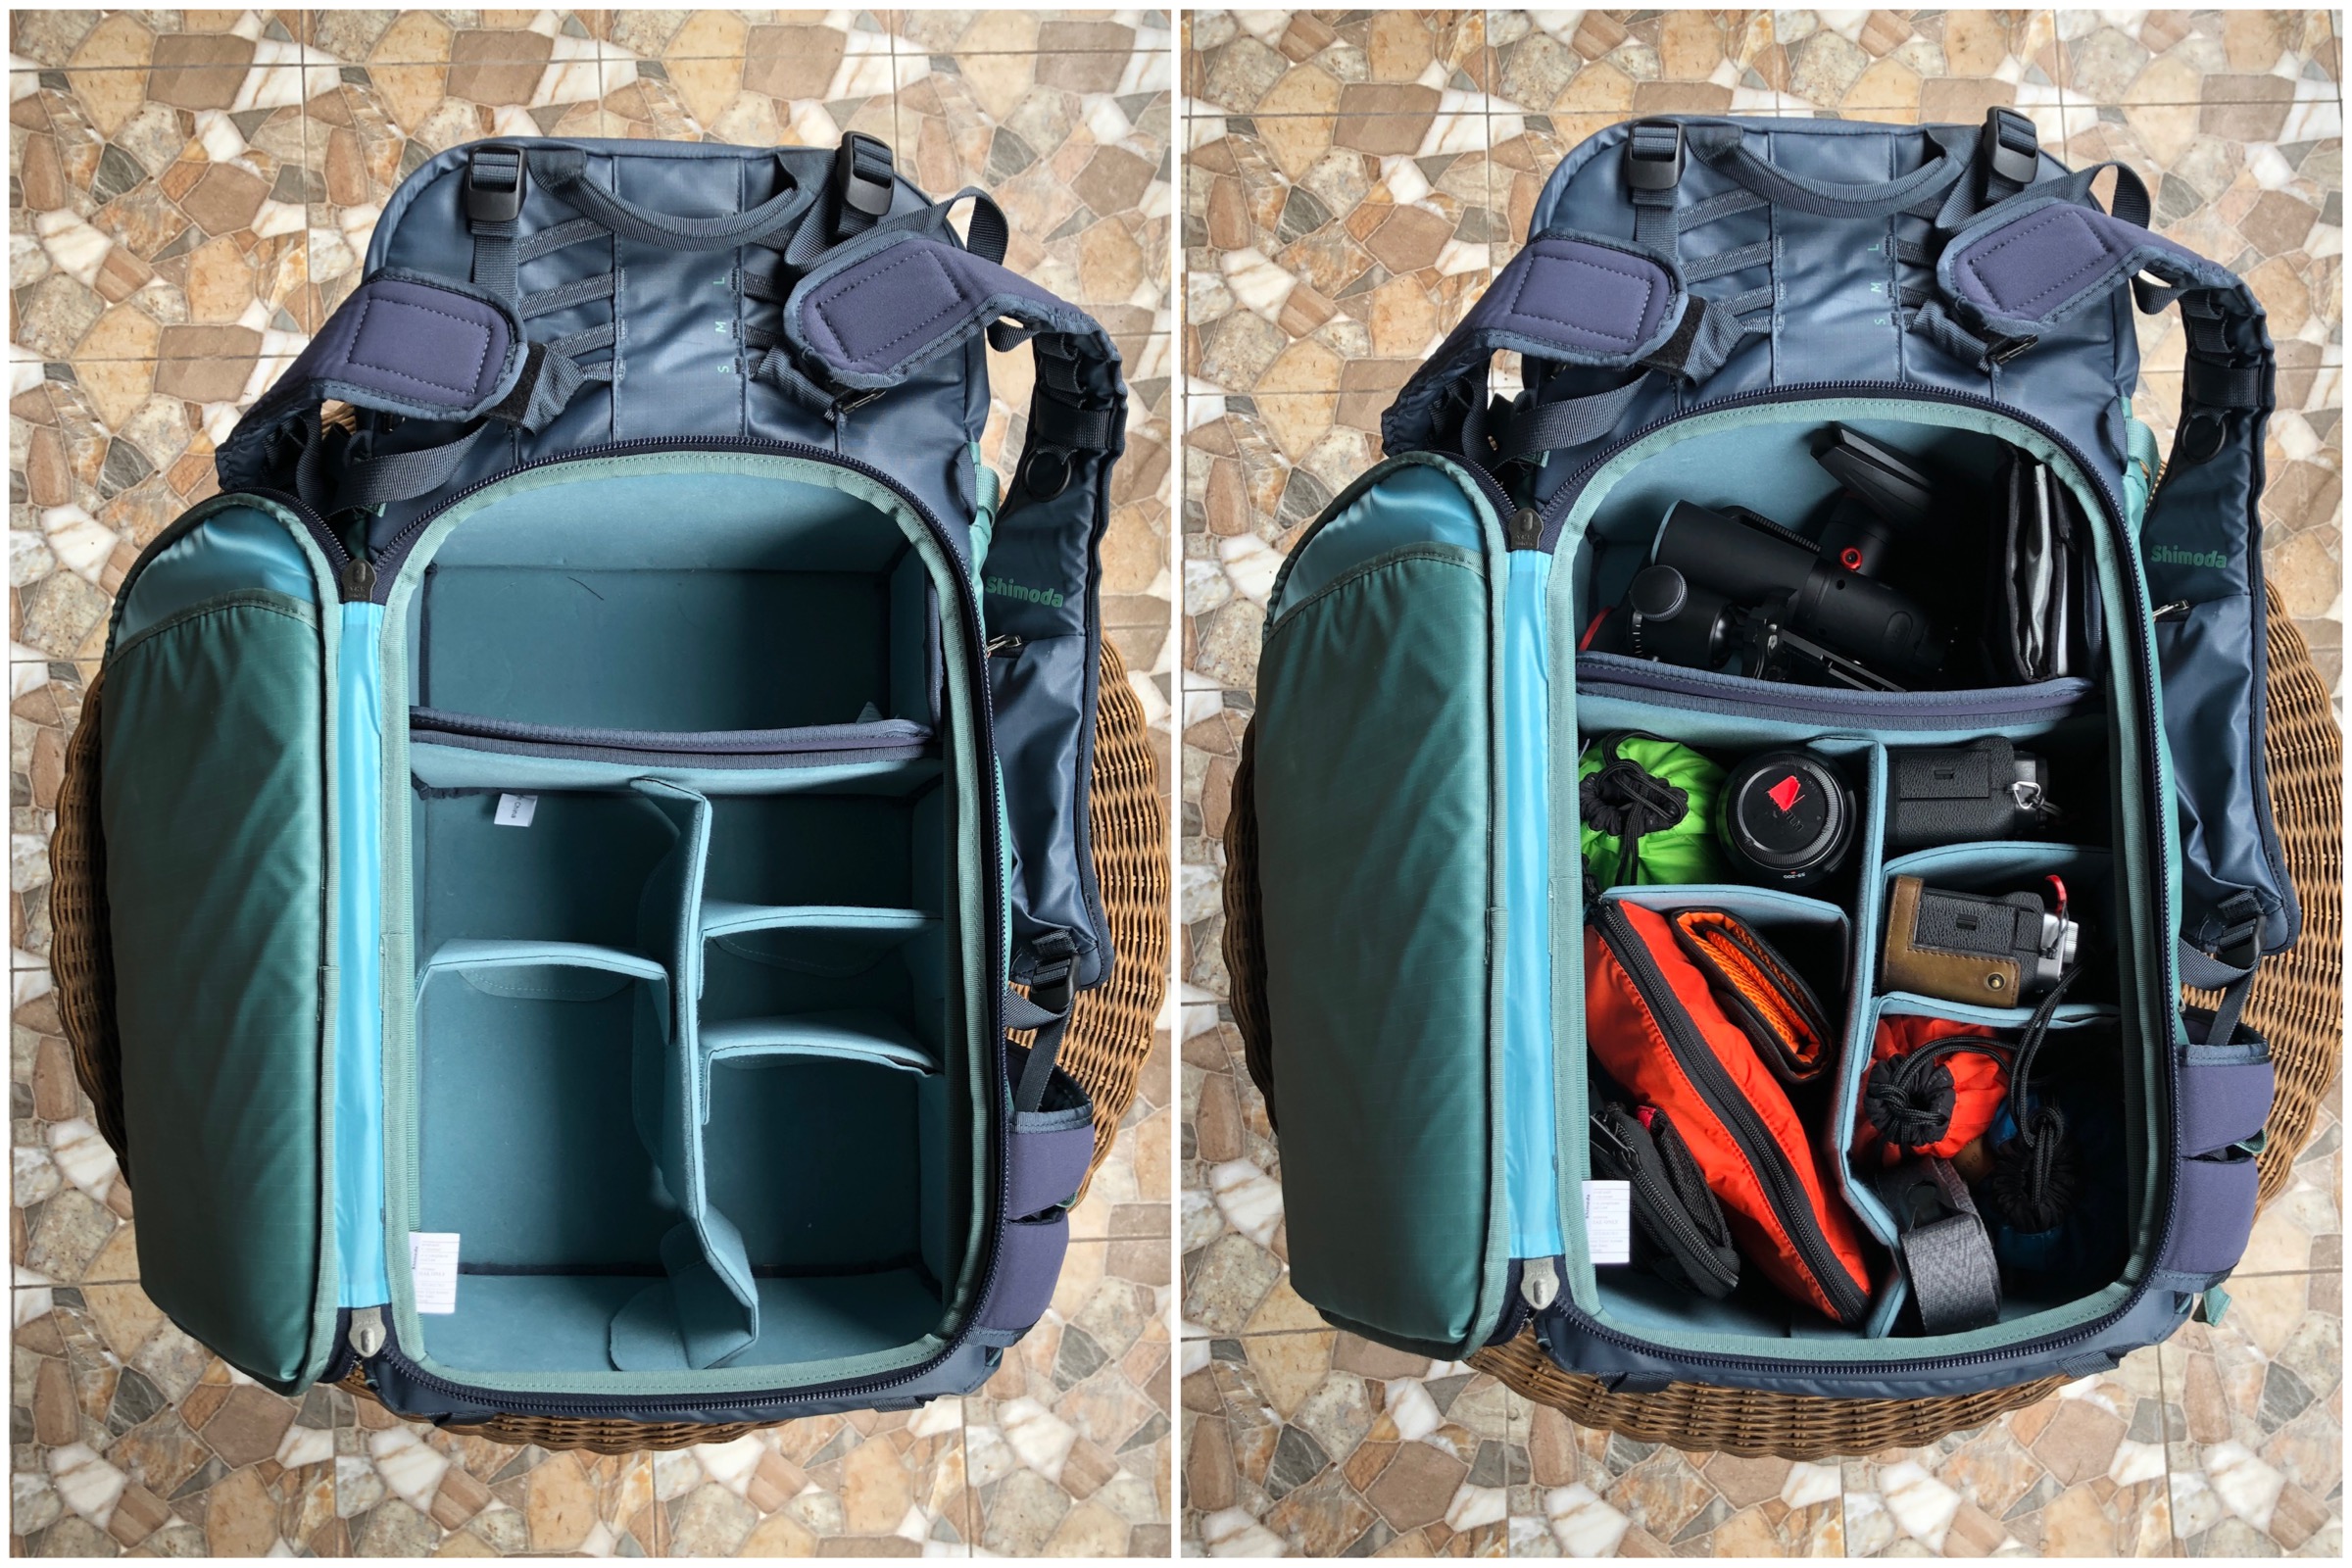
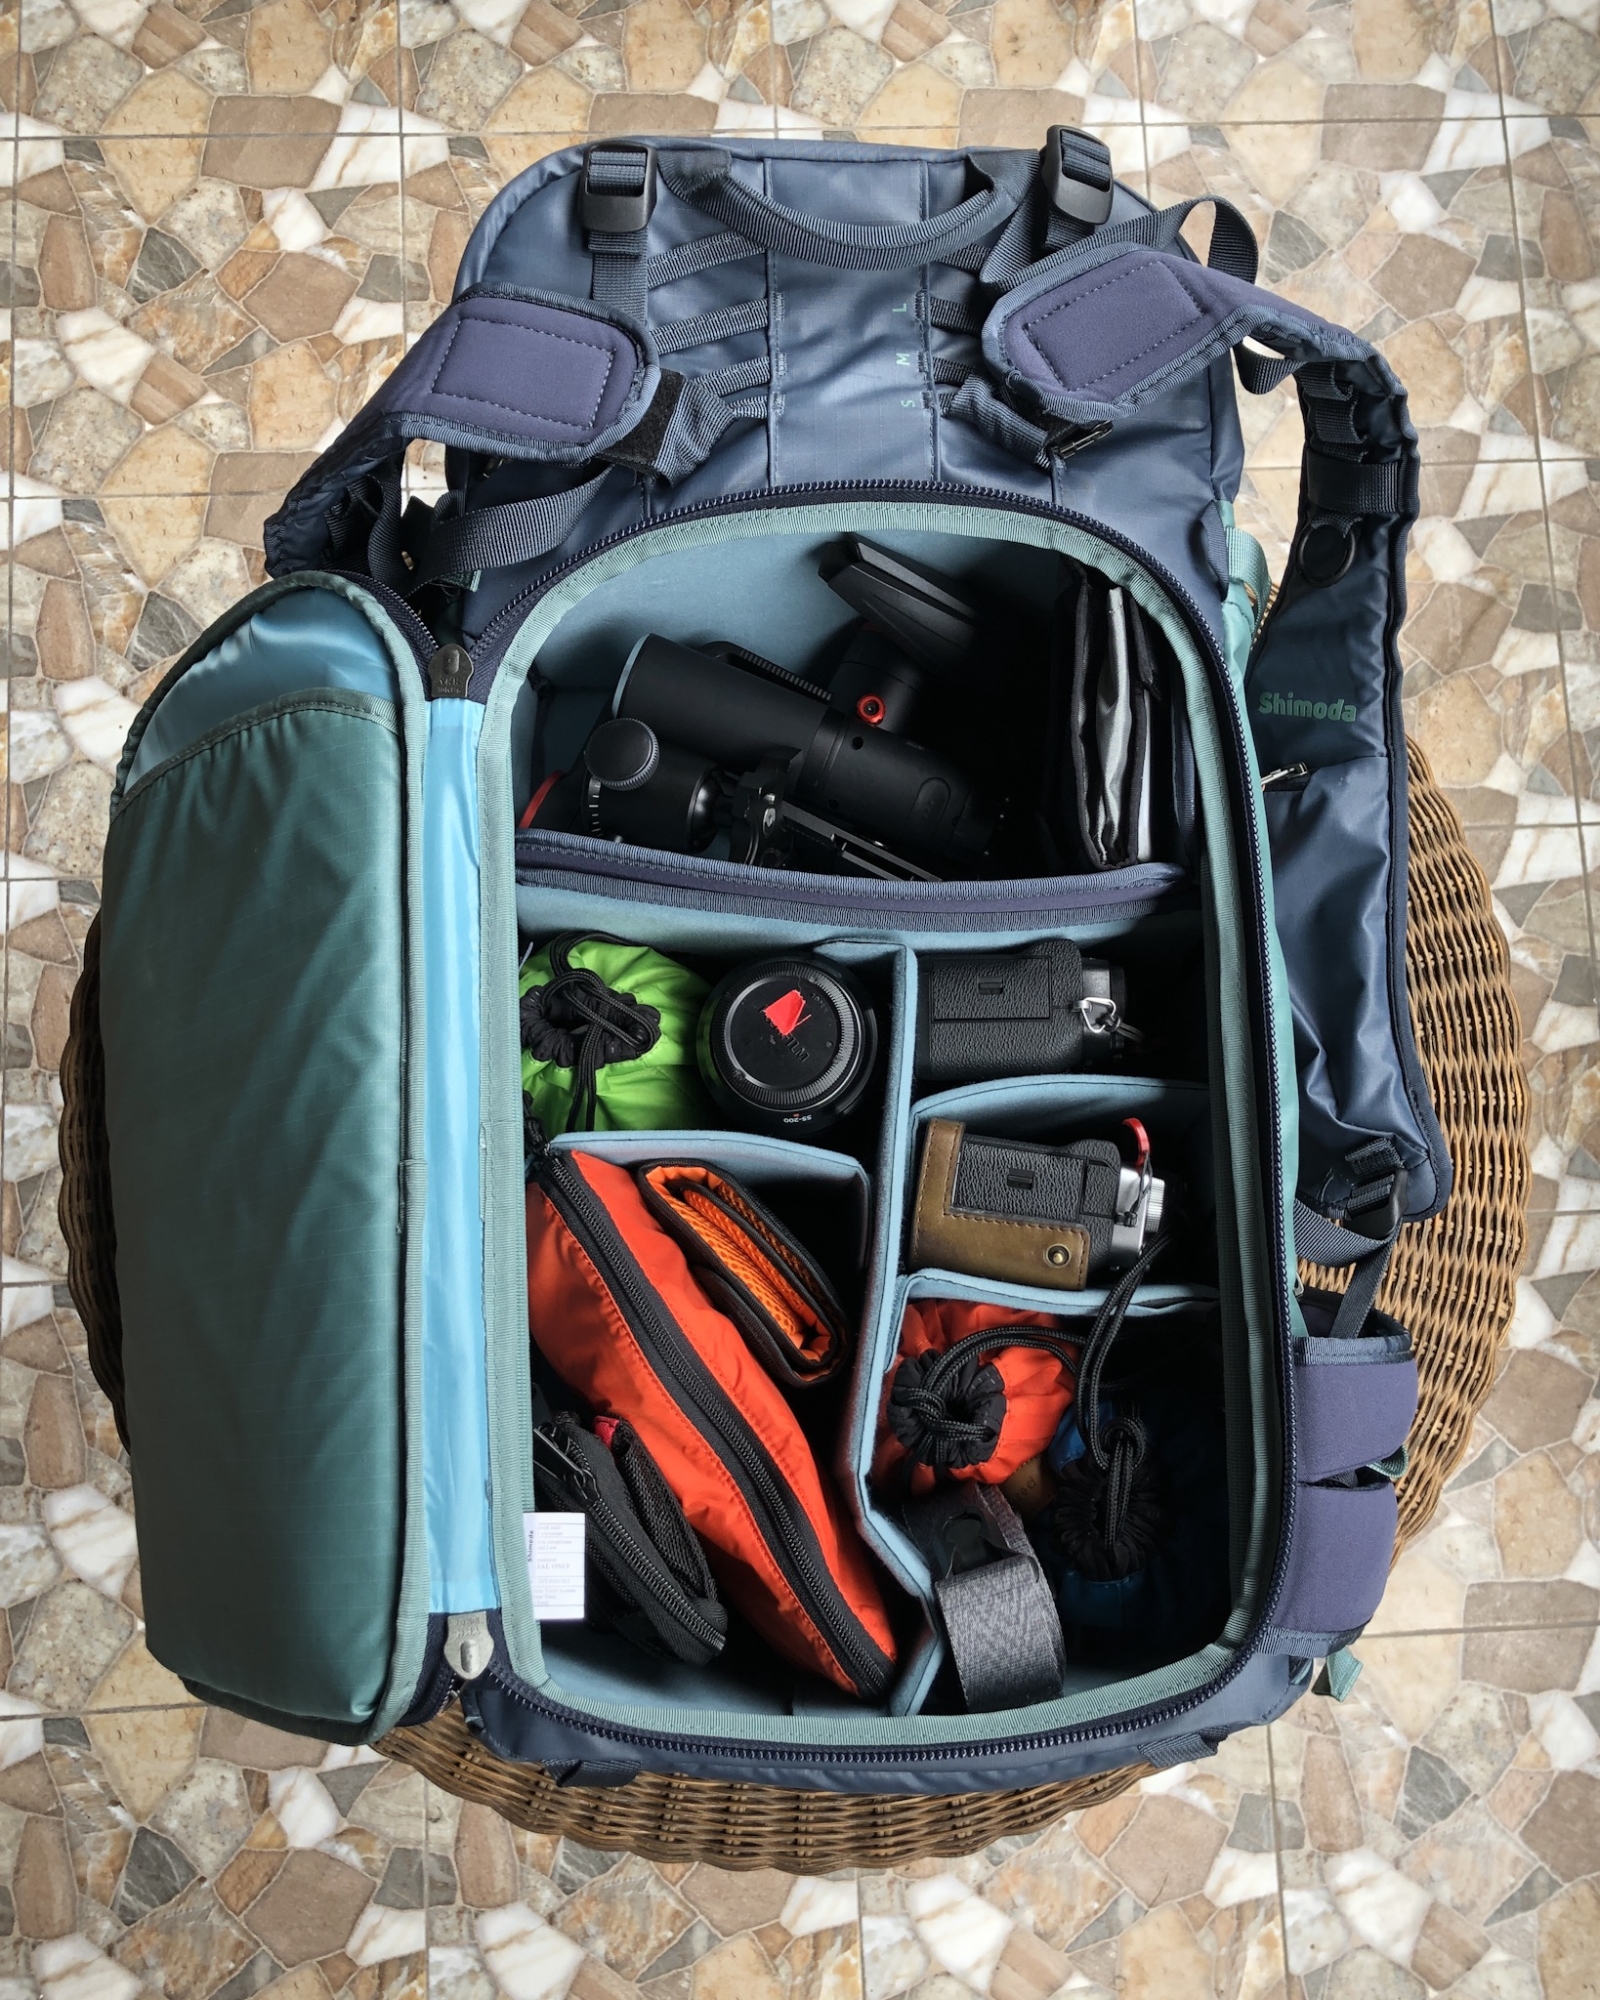
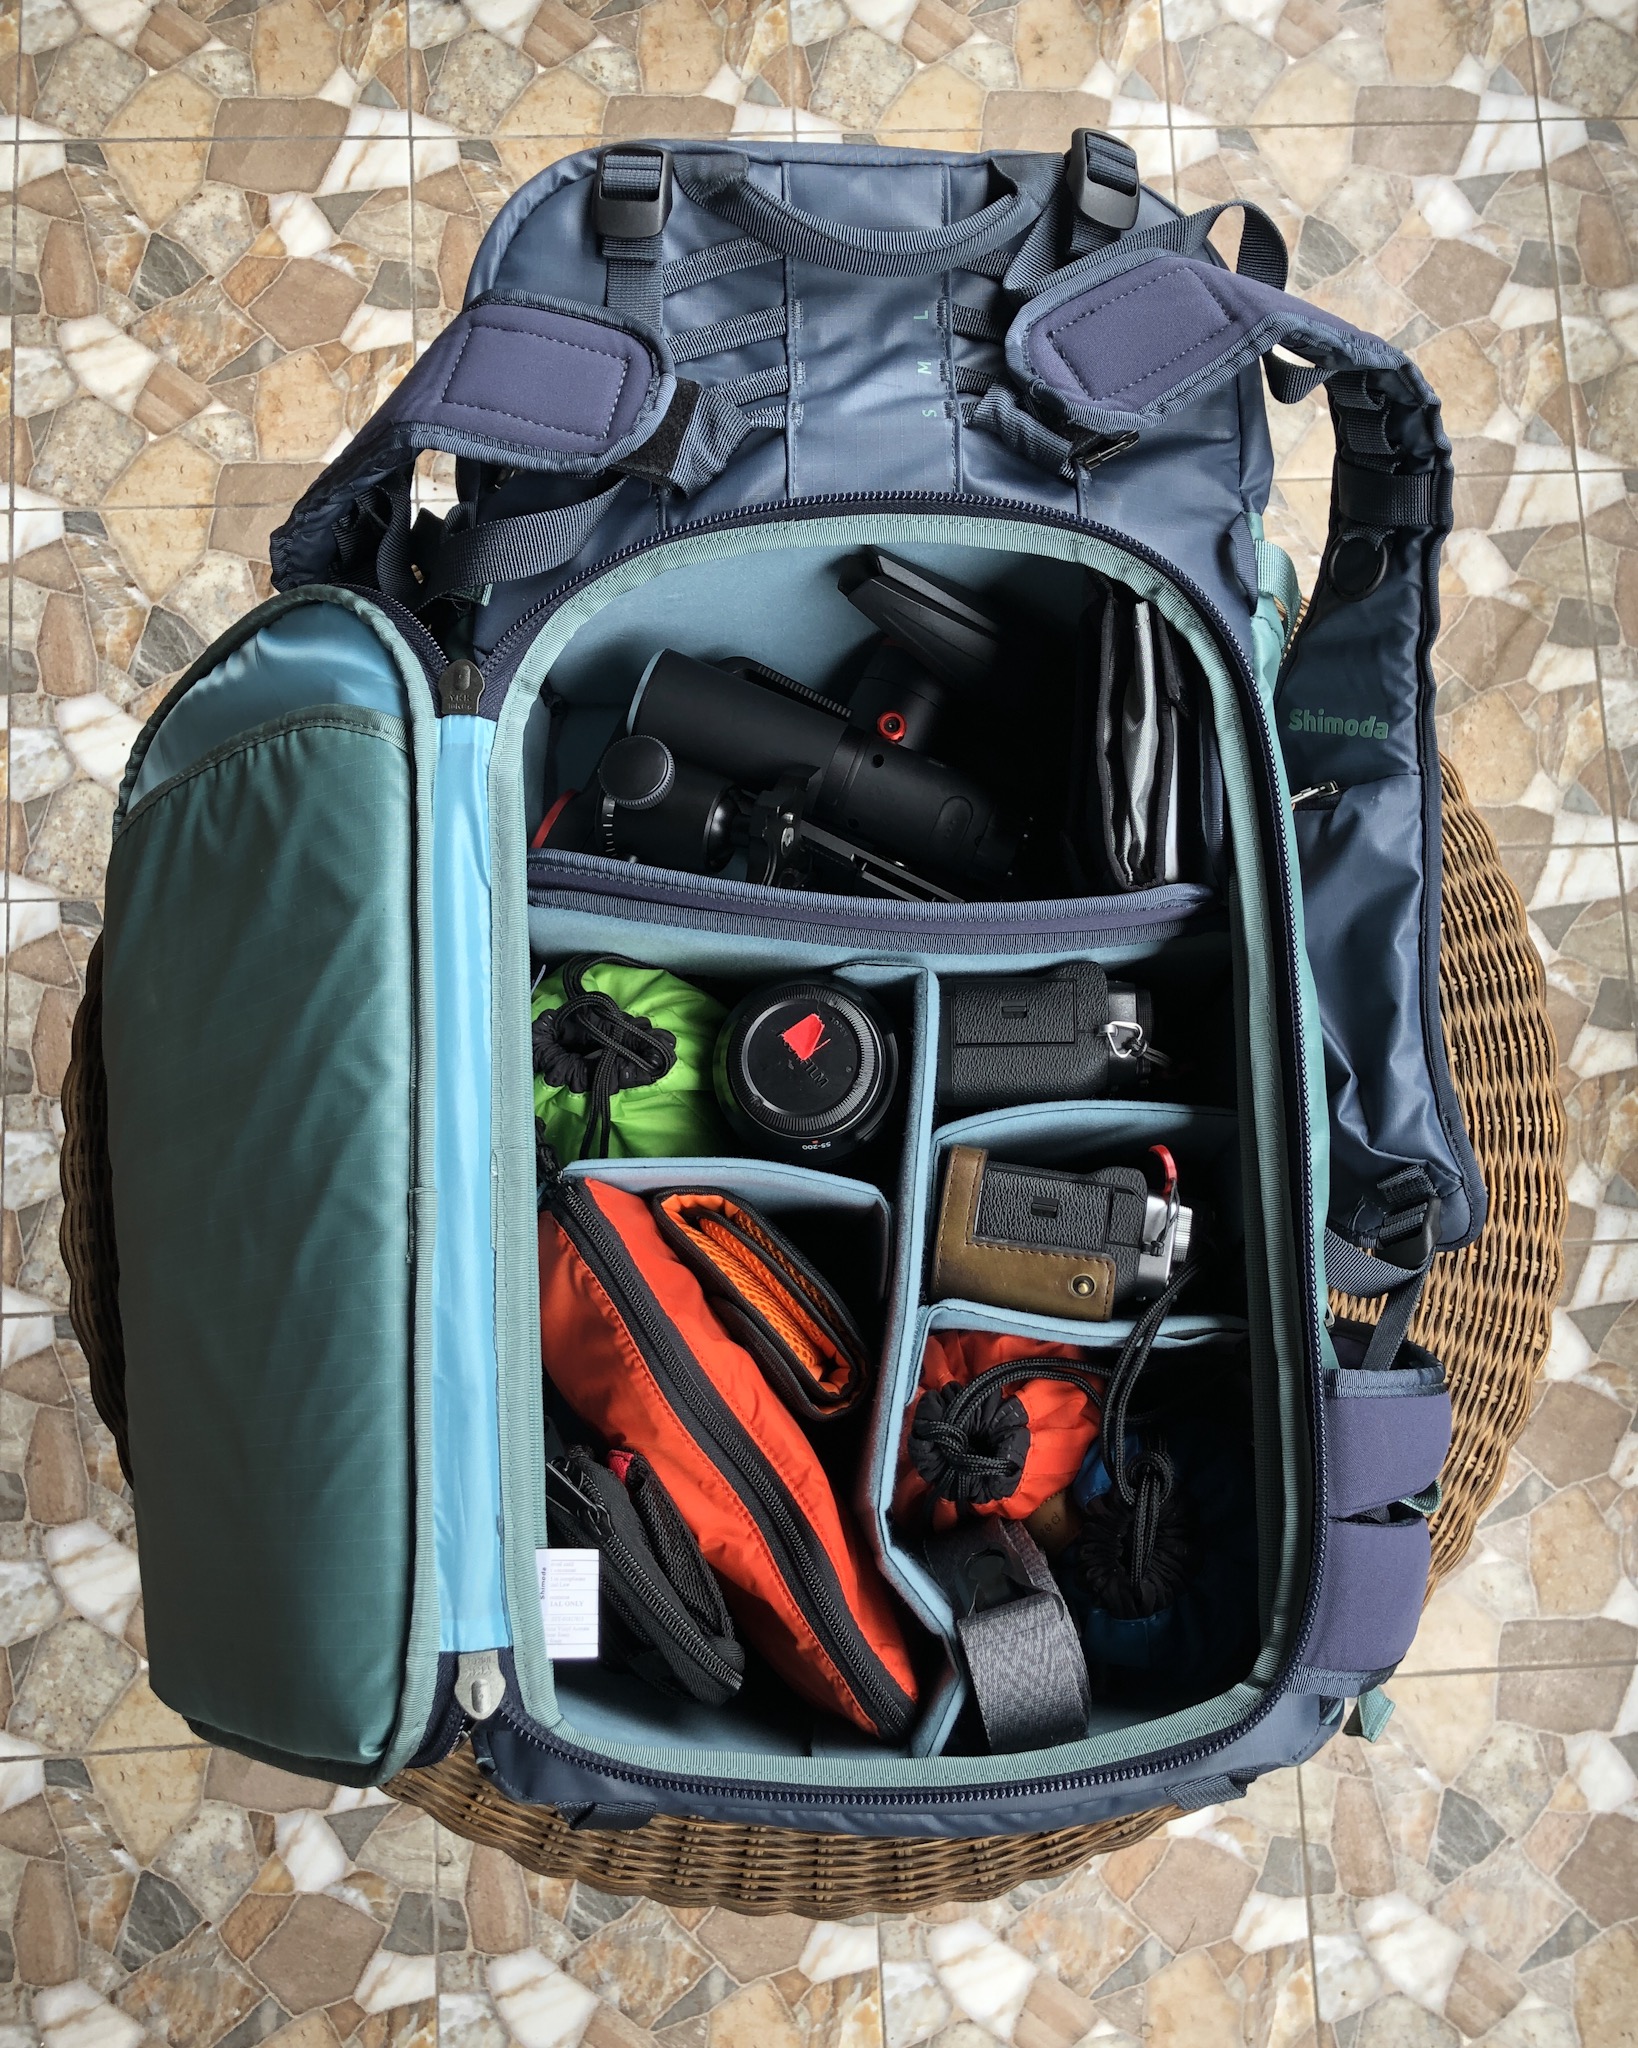
Here’s all the gear I’m carrying in my Shimoda bag with some more details of my packing setup below.
Cameras & Lenses:
- Fujifilm X-T3 (still photography)
- Fujifilm X-T2 (backup camera, video)
- Fujinon XF 23mm F1.4R
- Fujinon XF 56mm F1.2
- Fujinon XF 18–55mm
- Fujinon 55–200mm
Camera & Travel Accessories:
- iPad Pro 12.9″ with keyboard
- WD My Passport Wirelss Pro, 4 TB (photo backup hard-drive)
- SD card reader for iPad
- Kindle
- Travel plug adapter
- Small Shimoda accessory case
- Camera batteries and chargers
- USB charging cables
- SD Cards
- FeiyuTech a1000 video gimbal
- PlatyPod Pro and small tripod head
- Circular polarizer filters
- PeakDesign camera and wrist straps
- Lens wipes, sensor swabs, and cloths
Other items:
- Collapsible backpack
- Knitting project (I always knit when I travel!)
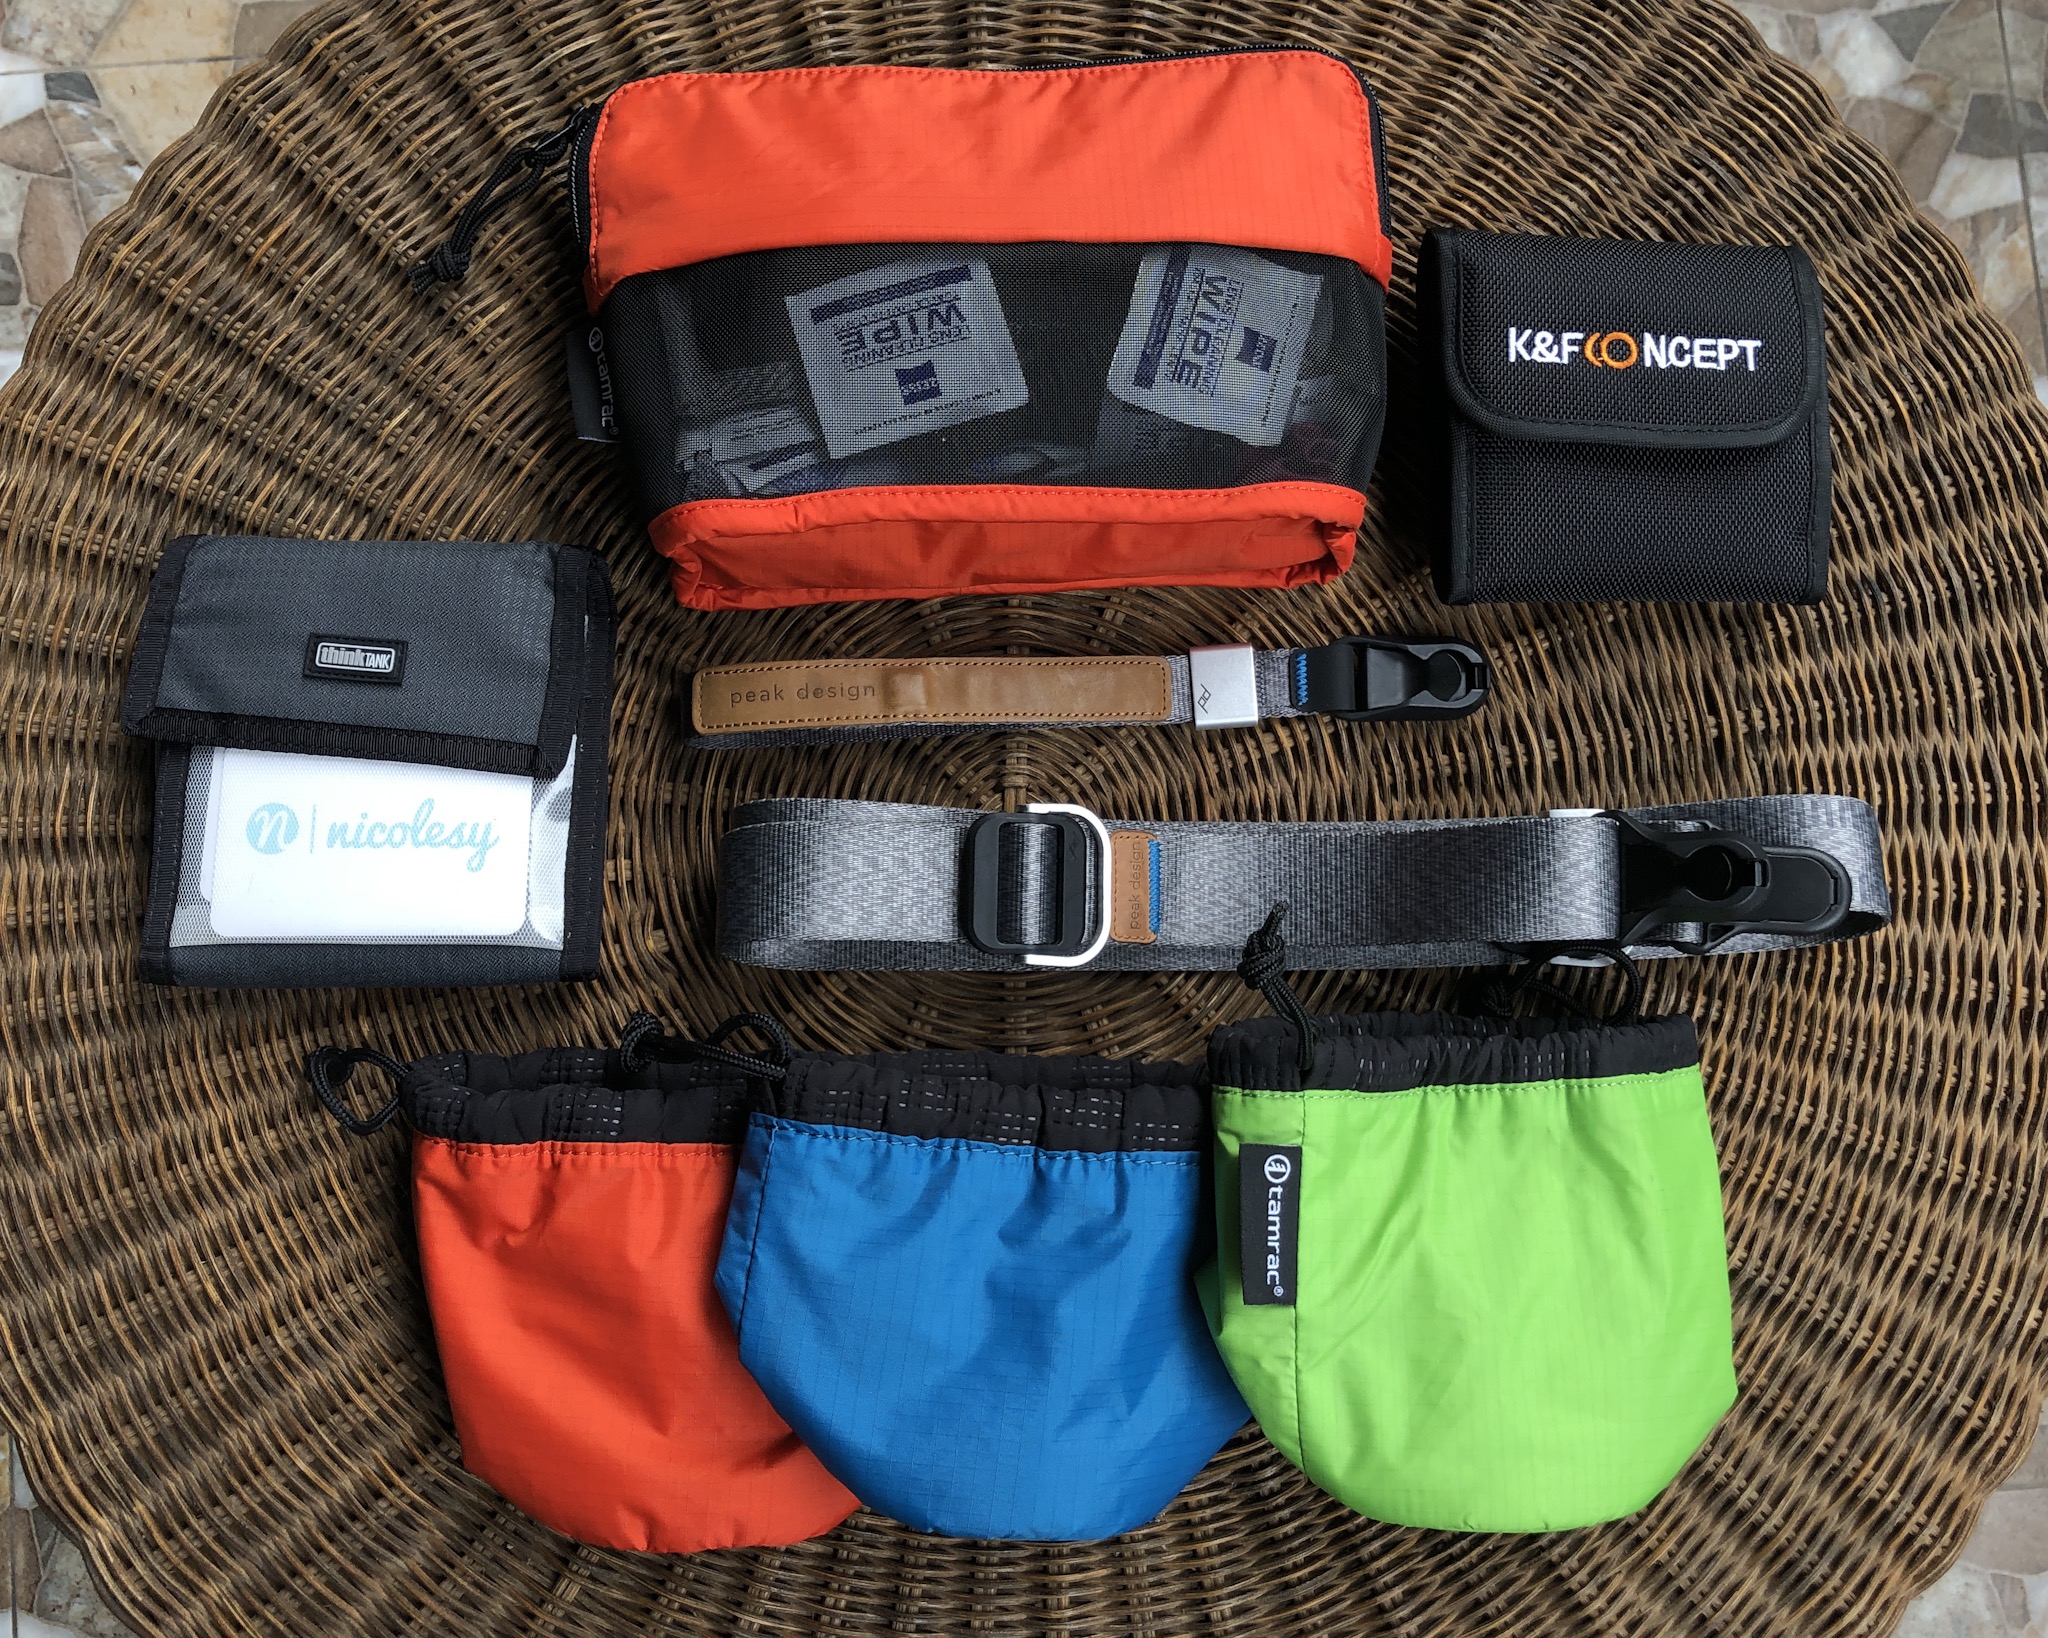
Many of the camera accessories I’m bringing along on this trip.
Camera Bag Strategy
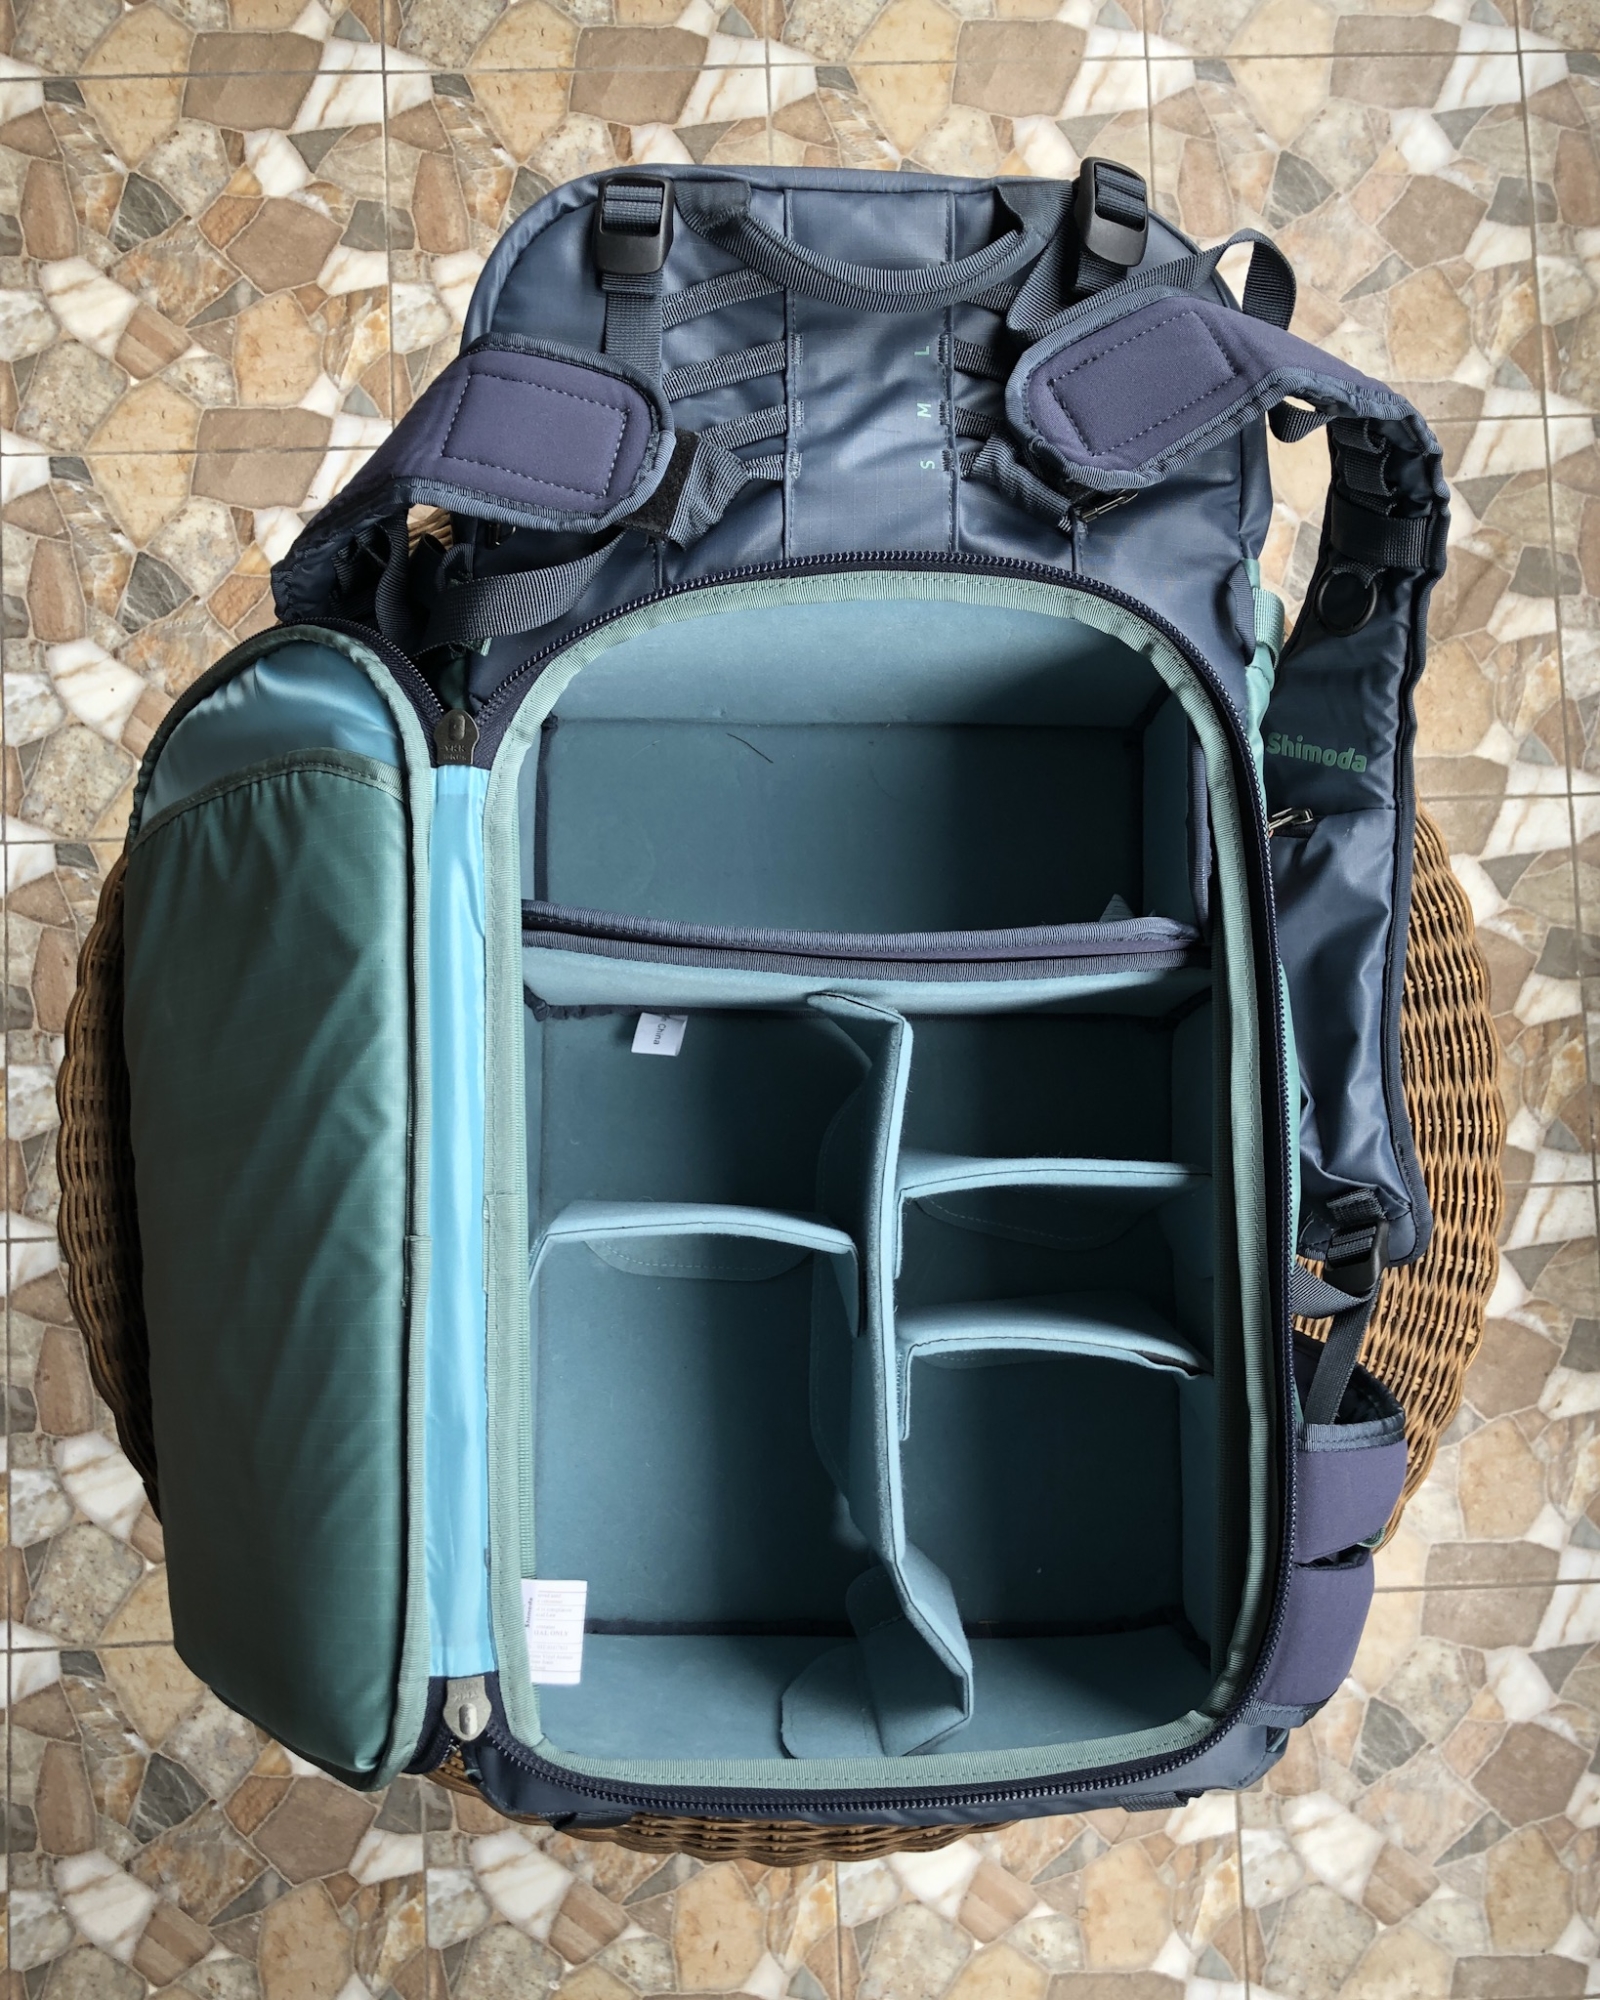
The Shimoda Explore 40 is my main camera bag. I will use it to carry all of my camera gear on airplanes, from city to city, and may also use it for short overnight adventures. Here I have a medium and small core unit inside to hold all of my camera gear, and I also placed the small accessory case at the top zipper area to hold my charging cables and other small accessories (the accessory case is not shown in these photos).
-
- Shimoda Explore 30 camera bag.

-
- Shimoda Explore 30 camera bag.
When traveling to urban destinations where there will be cities and villages, it’s always ideal to have a small camera bag to carry around town, such as a messenger or similar style. Larger camera bags are great for hiking and adventuring, but they can be cumbersome in crowded city environments. For this trip, because I am traveling with all carry-on luggage, I didn’t have room for a separate messenger bag, or even a smaller camera backpack.
So I decided to get creative.
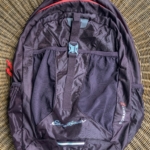
I found a small “collapsible” backpack, an Eddie Bauer Stowaway 30L, and when unfolded, fits the small Shimoda core unit at the bottom of the backpack perfectly. I decided to use this setup as my walk-around backpack where I can carry an extra lens or two, or even stash the camera away altogether. Plus I can stuff other items on top of it if needed (jacket, scarf, etc). This allows me to comfortably carry a small kit and also keep the gear protected inside of the core unit. Plus, it doesn’t look like a camera bag, and is super lightweight. It also gives me an “extra” bag to carry on the plane if I choose to check my luggage on my return flight home.
-
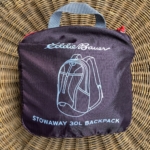
- The Eddie Bauer 30L Stowaway bag
-
- Eddie Bauer 30L Stowaway bag
-

- The Eddie Bauer 30L Stowaway bag with small Shimoda core unit.
This bag has been working perfectly and is a good alternative when you don’t have a lot of room or extra bags you can travel with. It’s not the best solution for walking around all day with heavy camera gear (there’s not a lot of padding so it’s not good if it’s overloaded), but it has been nice to stash an extra lens or my camera, along with a few essentials (lightweight scarf, money, phone, water, etc.).
iPad-only travel
For this trip I decided to skip the laptop and only carry my iPad. I recently upgraded to the new 12.9″ iPad Pro with both keyboard case and Apple Pencil, and will be importing my photos directly to my iPad instead of using a laptop. I’m using Lightroom CC for this trip, and will then migrate those photos to Lightroom Classic CC on my desktop once I return home. I expect to share more details on this experience, as it will be the first time I’ve traveled without a laptop and the longest I will go without using a “normal” computer in quite some time. So far, however, I LOVE it. It’s incredibly liberating to not carry around a heavy laptop, and working with my photos in Lightroom CC has been wonderful. I feel like I’m more in-tune with my images, and I have been enjoying editing and sorting my photos in my free time! (Disclaimer: Adobe has provided 10 TB of free storage space to use on my devices.)
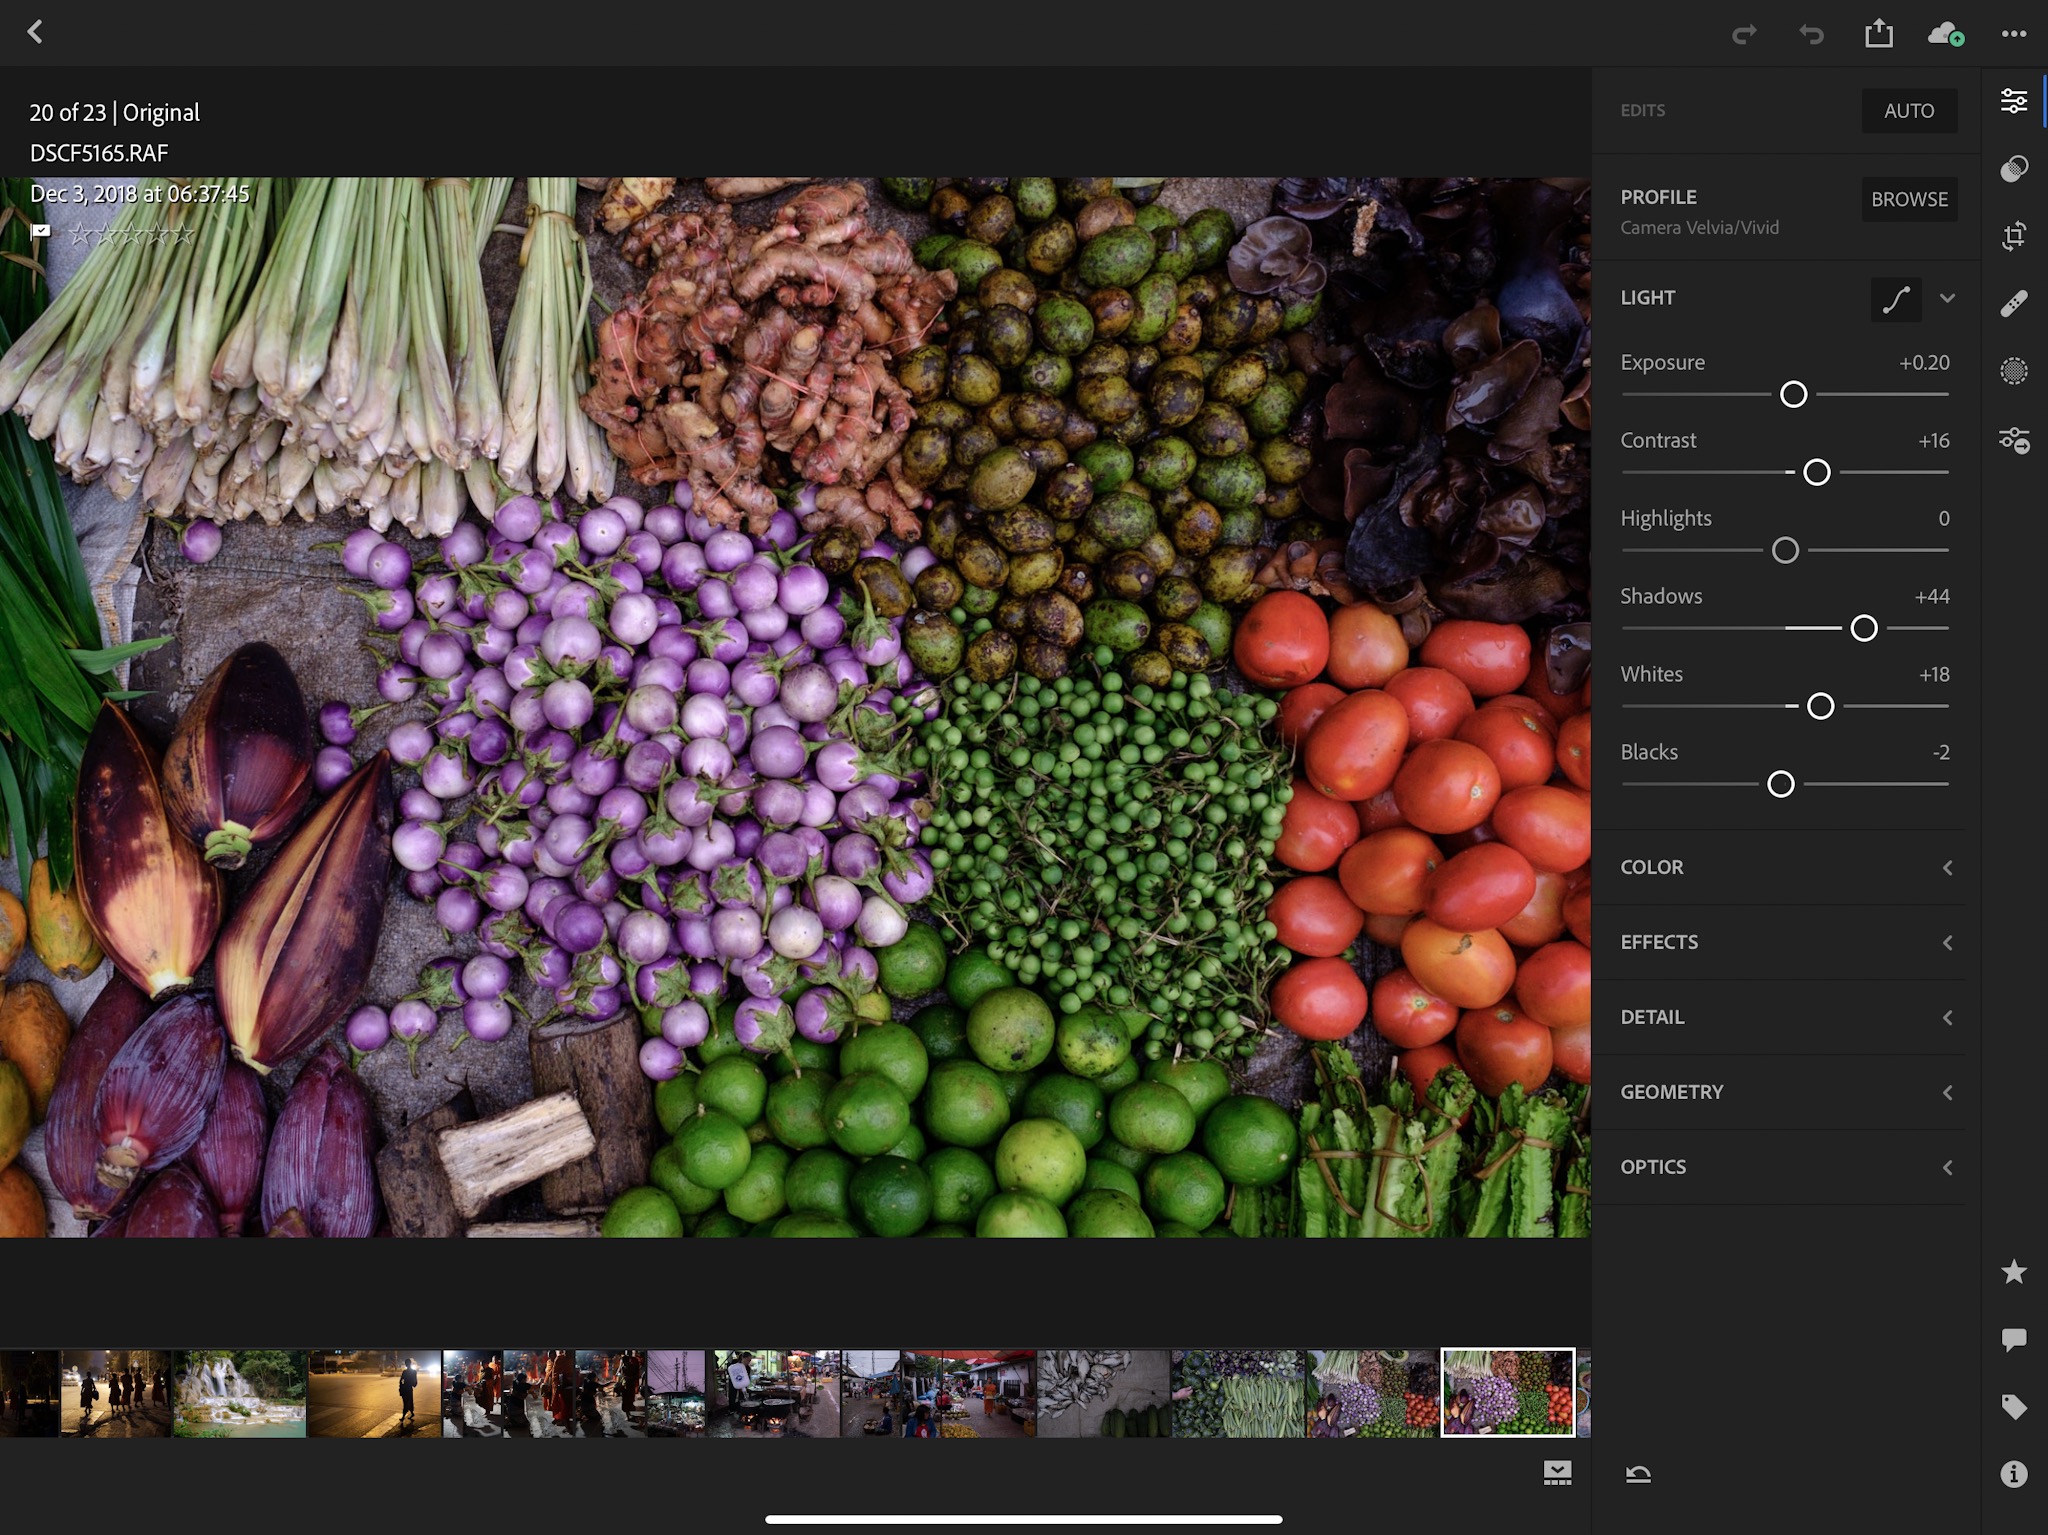
Lightroom CC on the iPad Pro.
Follow my adventures
If you’d like to follow my adventures to see what I’ve been up to during my travels, please check out my Instagram account, @nicolesy, where I will be sharing both still images and IG stories.
I just finished the first week of a three-week trip to Southeast Asia where I am traveling to Thailand, Laos, and Vietnam. This trip is primarily for me to make photographs and videos to add to my Stocksy portfolio, create content for my business, and also to explore, become inspired, and do some writing. I may even be able to sneak in some down-time while I’m there. I’m traveling with a small group, but while it’s not a “photography-themed” group I should have a lot of freedom to explore and create my own experiences.
This will be my first big trip with my Shimoda Explore 40 so I’m excited to put it through its paces. (Full disclosure: I was given this bag for free from Shimoda Designs.) I’ve used it many times on local outings and trips, but never internationally. So far I LOVE this bag and can say that this is the best adventure-style camera bag I have owned. It’s comfortable, the design is well thought out, and they even make it work well people of all shapes, sizes, and genders.
Overall, I packed fairly light. I’m traveling carry-on only, and for camera gear I decided to go with mostly small lenses for this trip, aside from the FUJINON 55–200mm that I have on loan from Fujifilm. With that said, I still have a fair amount of gear, but I was easily able to pack it into my Shimoda bag.
Please note: This article may contain affiliate links.
Camera Gear
My camera gear for this trip.
Here’s all the gear I’m carrying in my Shimoda bag with some more details of my packing setup below.
Cameras & Lenses:
- Fujifilm X-T3 (still photography)
- Fujifilm X-T2 (backup camera, video)
- Fujinon XF 23mm F1.4R
- Fujinon XF 56mm F1.2
- Fujinon XF 18–55mm
- Fujinon 55–200mm
Camera & Travel Accessories:
- iPad Pro 12.9″ with keyboard
- WD My Passport Wirelss Pro, 4 TB (photo backup hard-drive)
- SD card reader for iPad
- Kindle
- Travel plug adapter
- Small Shimoda accessory case
- Camera batteries and chargers
- USB charging cables
- SD Cards
- FeiyuTech a1000 video gimbal
- PlatyPod Pro and small tripod head
- Circular polarizer filters
- PeakDesign camera and wrist straps
- Lens wipes, sensor swabs, and cloths
Other items:
- Collapsible backpack
- Knitting project (I always knit when I travel!)
Many of the camera accessories I’m bringing along on this trip.
Camera Bag Strategy
The Shimoda Explore 40 is my main camera bag. I will use it to carry all of my camera gear on airplanes, from city to city, and may also use it for short overnight adventures. Here I have a medium and small core unit inside to hold all of my camera gear, and I also placed the small accessory case at the top zipper area to hold my charging cables and other small accessories (the accessory case is not shown in these photos).
-
- Shimoda Explore 30 camera bag.
-
- Shimoda Explore 30 camera bag.
When traveling to urban destinations where there will be cities and villages, it’s always ideal to have a small camera bag to carry around town, such as a messenger or similar style. Larger camera bags are great for hiking and adventuring, but they can be cumbersome in crowded city environments. For this trip, because I am traveling with all carry-on luggage, I didn’t have room for a separate messenger bag, or even a smaller camera backpack.
So I decided to get creative.
I found a small “collapsible” backpack, an Eddie Bauer Stowaway 30L, and when unfolded, fits the small Shimoda core unit at the bottom of the backpack perfectly. I decided to use this setup as my walk-around backpack where I can carry an extra lens or two, or even stash the camera away altogether. Plus I can stuff other items on top of it if needed (jacket, scarf, etc). This allows me to comfortably carry a small kit and also keep the gear protected inside of the core unit. Plus, it doesn’t look like a camera bag, and is super lightweight. It also gives me an “extra” bag to carry on the plane if I choose to check my luggage on my return flight home.
-
- The Eddie Bauer 30L Stowaway bag
-
- Eddie Bauer 30L Stowaway bag
-
- The Eddie Bauer 30L Stowaway bag with small Shimoda core unit.
This bag has been working perfectly and is a good alternative when you don’t have a lot of room or extra bags you can travel with. It’s not the best solution for walking around all day with heavy camera gear (there’s not a lot of padding so it’s not good if it’s overloaded), but it has been nice to stash an extra lens or my camera, along with a few essentials (lightweight scarf, money, phone, water, etc.).
iPad-only travel
For this trip I decided to skip the laptop and only carry my iPad. I recently upgraded to the new 12.9″ iPad Pro with both keyboard case and Apple Pencil, and will be importing my photos directly to my iPad instead of using a laptop. I’m using Lightroom CC for this trip, and will then migrate those photos to Lightroom Classic CC on my desktop once I return home. I expect to share more details on this experience, as it will be the first time I’ve traveled without a laptop and the longest I will go without using a “normal” computer in quite some time. So far, however, I LOVE it. It’s incredibly liberating to not carry around a heavy laptop, and working with my photos in Lightroom CC has been wonderful. I feel like I’m more in-tune with my images, and I have been enjoying editing and sorting my photos in my free time! (Disclaimer: Adobe has provided 10 TB of free storage space to use on my devices.)
Lightroom CC on the iPad Pro.
Follow my adventures
If you’d like to follow my adventures to see what I’ve been up to during my travels, please check out my Instagram account, @nicolesy, where I will be sharing both still images and IG stories.

Nicole is a photographer, published author, and educator specializing in Lightroom, Photoshop, and photography. She is best known for her books on food photography but is widely versed in various photographic genres, including landscape, nature, stock, travel, and experimental imagery.


And these bags weighed? Facing a 15 lb limit for both carryons on my next adventure. Would love to not check luggage but . . .
This bag was 20–25 lbs, so I’d have to scale back some gear to fit those limits. Is it a 15 lb limit total? Or for each bag?
Any comments on the Tamrac pouches? Are you satisfied with the protection that they give your lenses? Ae they padded? do you use them in a case with no dividers. Thanks
They do have some padding, and sometimes I put them alongside other lenses with no dividers. I also feel comfortable using them “free floating” in a purse, for example, and really like them a lot.
My gear for India trip was xt2,16-55mm, 3 batteries,charger,2 SD cards,laptop ,messenger bag and a travel tripod .
Very nice! I love my 18–55mm lens but I am considering the 16–55mm for the extra few stops of light.
I hope that you have a wonderful time and that return safe and sound.
Thanks, me too! ????
Hi Nicole, I’m using the a1000 as well. I did have to make a custom cable to trigger the X-T2 shutter from the gimbal. Did you manage to get a premade one? Enjoy the trip!
I couldn’t really get it to work, so I end up using a normal cable release to start and stop the video recording. I haven’t really used it much on this trip yet, but I’m hoping to get some footage in Ha Long Bay this weekend if the weather cooperates.
Are you taking a tripod? If you are where is that packed? As a Canon SLR user I have to manage what I take very carefully when I travel on a plane with the camera going hand luggage and the tripod packed in the main suitcase. Even though the tripod is carbon fibre I usually have to sacrifice taking a few clothes in order to take the tripod.
I did not take a tripod, not a normal one, at least. I opted for a Platypod and small Joby ball head instead. It’s a flat plate that holds a ball head and can be set on a table, railing, etc. I’m glad I did this, too. This type of travel is not filled with many landscapes (and it’s not a photo trip so the opportunities are less likely to be there) so I didn’t want to haul my carbon fiber around.
Great timing on this blog post for me – I’m planning a trip with a Fuji kit for next year and need to minimize size/weight more than I have in the past. Please post more about how the iPad Pro works out. I’d love to ditch the laptop this time. Your comment about Adobe giving you 10TB – is this in the Adobe cloud? I see you also have a WD Passport 4TB – how do you move the images to it from the iPad and is it a fast or slow connection?
I do have a blog post planned for my experiences with the iPad Pro. I’m waiting until after my trip to post everything so I can share all the details. But so far I LOVE using the iPad with no laptop. It has a few limitations, and some tasks take a little bit longer than others, but I think this will be my “new normal” when traveling.
Also, the 10TB is for cloud storage (I don’t really need it at this poin because I mostly use Lightroom Classic at homet, but wanted to share that disclosure). FWIW I do pay full price for the Adobe CC (all of the apps). :)
Also, the WD Passport 4TB has an SD card slot that allows me to import the photos directly to the HD. It’s only for backup and does not connect to the iPad, as I use an SD card reader on my iPad to store the photos directly to the iPad. (I got the 1TB version so I wouldn’t have to worry about iPad storage space.) Basically, I’ll store the iPad in one bag, and the WD Passport in another bag, and so if something bad happens and I lose one of the bags, at least I’ll have my photos.
Thank you Nicole for sharing your experience with us. You are so generous with your time and knowledge.
Looking forward to know more about your trip and how the iPad along with the WD Passport work for you since I was thinking about the same combo.
I am still debating if I should go all out for the 1 TB ipad or get a 256 GB but two WD Passports and use 1 as backup. In addition I will carry enough SD cards so I don’t ever have to reuse cards during trips. I shoot Raw+Jpg – 90mb files.
Would you mind sharing what type of SD reader you use and how is the transfer rate. I wish you a safe, productive and enjoyable trip.
I purchased the 1TB for a few reasons. First, I want to make sure that I never have to worry about HD space on the iPad. In 11 days of travel I’ve already filled up nearly 180 GB of raw files to Lightroom CC, so I know that I made a good decision. Plus, I also tend to fill up my iPad with movies and TV shows for the trip, so I never have to worry about whether or not I’ll have enough space for them.
Also, one thing the 1TB iPad Pro has that the others do not is extra ram (6GB compared to 4GB on the other models). That could mean faster processing, although I don’t know for sure. I do know that it was enough of a reason for a friend of mine to opt for the 1TB model instead of the 512GB.
And to answer you question about the SD reader, I use the Apple-branded USB-C to SD card reader and the transfer is very fast (almost so fast that I questioned whether or not it was copying over the files properly!).
What can you say about the FeiyuTech AK2000 – I don’t need an expense gimbal, but would like to use one occasionally, is this worth the money to use with my X-T2 or T3?
I have the A1000, it works just fine for my purposes. Probably not the “best” gimbal on the market, but it’s small and inexpensive, and video is not my primary focus. I would recommend researching through YouTube videos/reviews to get a good idea of what they are like.
A nice collection of images as well as stuff you have provided here for us. very informative and helpful information and tips you have written here for the people who really love to travel. These tips are helpful to manage the traveling gears in manners to avoid the massive suitcases and especially manage camera in traveling safely. I am also doing kinda same work, please spare some time and suggest me improvements as I am a newbie here in this business. I am very happy to see your growth in Google. Thanks and Regards!
I am also doing kinda same work, please spare some time and suggest improvements to https://travitude-essentials.com/collections/all. I am very happy to see your growth in Google. Thanks and Regards!